Creating Discounts & Offers
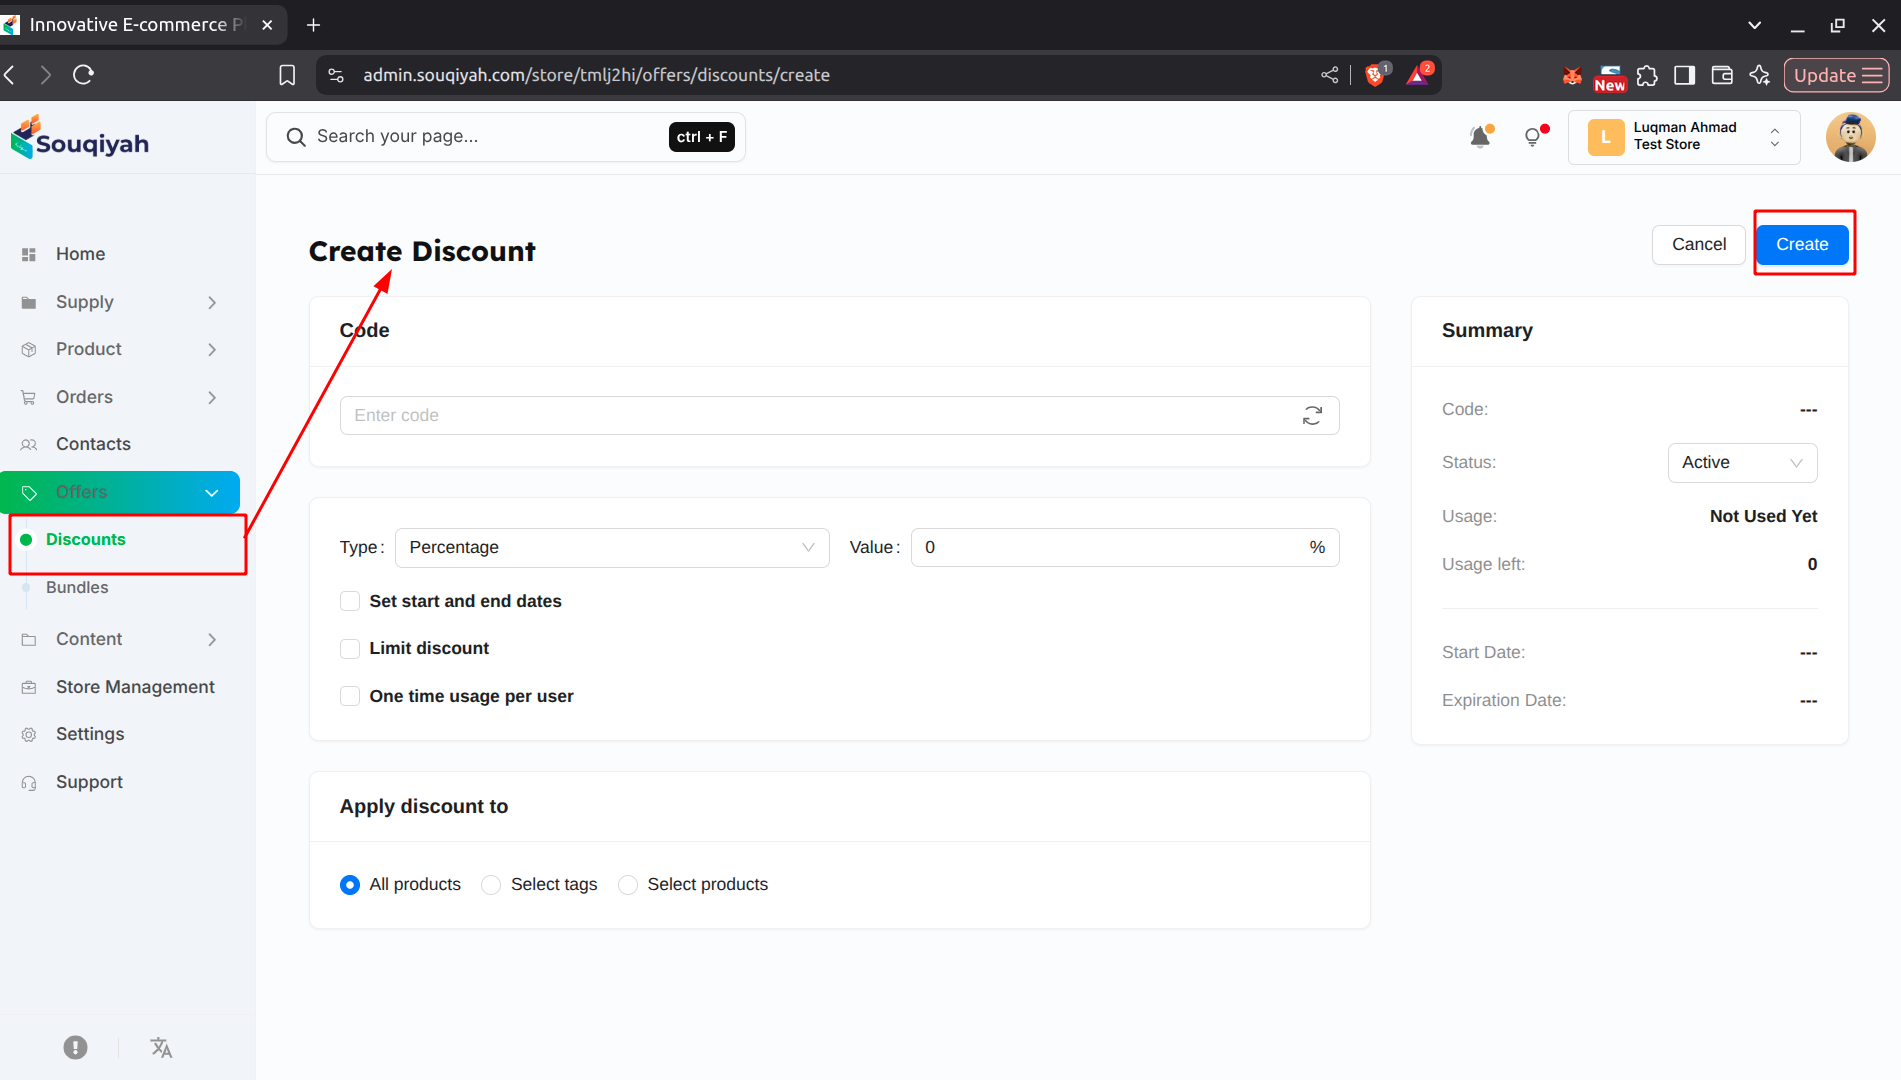
Step 1: Accessing Discount Creation
- Go to Offers → Discounts from the sidebar
- Click "Create" at the top right
- You’ll see the discount creation form
Step 2: Setting Up Discount Code
- Discount Code: Enter a code customers will use (e.g., "SAVE20")
- Generate Code: Click the refresh icon to auto-generate
- Code must be unique
- Use letters and numbers only
Step 3: Choosing Discount Type
- Type: Select from dropdown:
- Percentage: Discount as a percentage (e.g., 20% off)
- Fixed Amount: Fixed dollar/currency amount off (e.g., $10 off)
- Value: Enter the discount amount
- For percentage: Enter number (e.g., 20 for 20%)
- For fixed: Enter amount (e.g., 10 for $10)
Step 4: Setting Dates (Optional)
- Check "Set start and end dates"
- Start Date: When the discount becomes active
- End Date: When it expires
- Leave unchecked to keep it active indefinitely
Step 5: Limiting Usage (Optional)
- Check "Limit discount" to set a usage limit
- Usage Limit: Maximum number of times the code can be used
- Example: Enter 100 to allow 100 uses total
Step 6: One-Time Usage Per Customer (Optional)
- Check "One time usage per user"
- Each customer can use the code once
- Useful for first-time customer promotions
Step 7: Choosing Where to Apply
- Select one option:
- All Products: Applies to everything
- Select Tags: Applies to products with specific tags
- Select Products: Applies to specific products only
Step 8: Selecting Tags (If Applicable)
- If you chose "Select Tags":
- Enter tags in the Tags field
- Press Enter or comma after each tag
- Example: "sale", "clearance", "winter"
Step 9: Selecting Products (If Applicable)
- If you chose "Select Products":
- Click "Select products"
- Choose products from the popup
- Click "Done" or "Save"
- Selected count is shown
Step 10: Setting Status
- In the Summary panel on the right:
- Status: Choose "Active" or "Disabled"
- Active: Code can be used
- Disabled: Code is inactive
Step 11: Reviewing Summary
- Summary panel shows:
- Discount code
- Status
- Usage count
- Usage left
- Start and end dates
Step 12: Saving Discount
- Click "Save" at the bottom
- You’ll see a success message
- Discount is created and ready to use
Common Issues and Solutions
Discount Not Working
- Solution: Check status is "Active", verify dates are correct, check usage limit not reached, ensure products match selection
Code Already Exists
- Solution: Use a different code, codes must be unique, try generating a new code
Discount Not Applying to Products
- Solution: Verify product selection is correct, check product tags match, ensure discount is active, verify date range
Usage Limit Reached
- Solution: Increase usage limit, create new discount code, check usage count
Can't Edit Discount
- Solution: Verify you have edit permissions, refresh the page, check if discount exists
Unsupported block: delimiter
Best Practices
- Discount Creation
- Use clear, memorable codes
- Set appropriate discount values
- Choose right application method
- Set realistic usage limits
- Campaign Management
- Monitor active campaigns regularly
- Deactivate expired discounts
- Test before launching
- Keep campaigns organized
- Performance Tracking
- Review usage statistics
- Compare campaign performance
- Learn from successful campaigns
- Adjust strategies based on data
- Customer Experience
- Make codes easy to remember
- Communicate discounts clearly
- Set reasonable expiration dates
- Honor all active discounts
- Business Strategy
- Plan campaigns in advance
- Use discounts strategically
- Don't over-discount
- Track profitability